
OP Plush Making Guide

Before delving into this, I want to note that I'm just an amateur myself, but I wanted to make myself a qt waifu plush and had some degree of success with it, so I'm going to share the (limited) knowledge that I've acquired. I tried to write this as if it would have been helpful to me when I first started my plush project as I had absolutely no sewing experience.
Previous sewing experience is not required as long as you're willing to do a little practice first. Remember, sewing isn't hard, it's just (very) time consuming.
If you have any questions about anything, just ask in the thread! I'm always lurking.
But anyways, let's start this off with a few pictures of the finished Twilight plush.
---
If you're wanting to make a lewd pony, you should check out this hidden compartment guide written by the big lewd twi anon:
https://docs.google.com/document/d/1ATHzkeJLr1l6JulzQXRm3bIhYPjuSfjcNsExaXsFQxM/edit

View from the front (with a cute bow I made afterwards.)
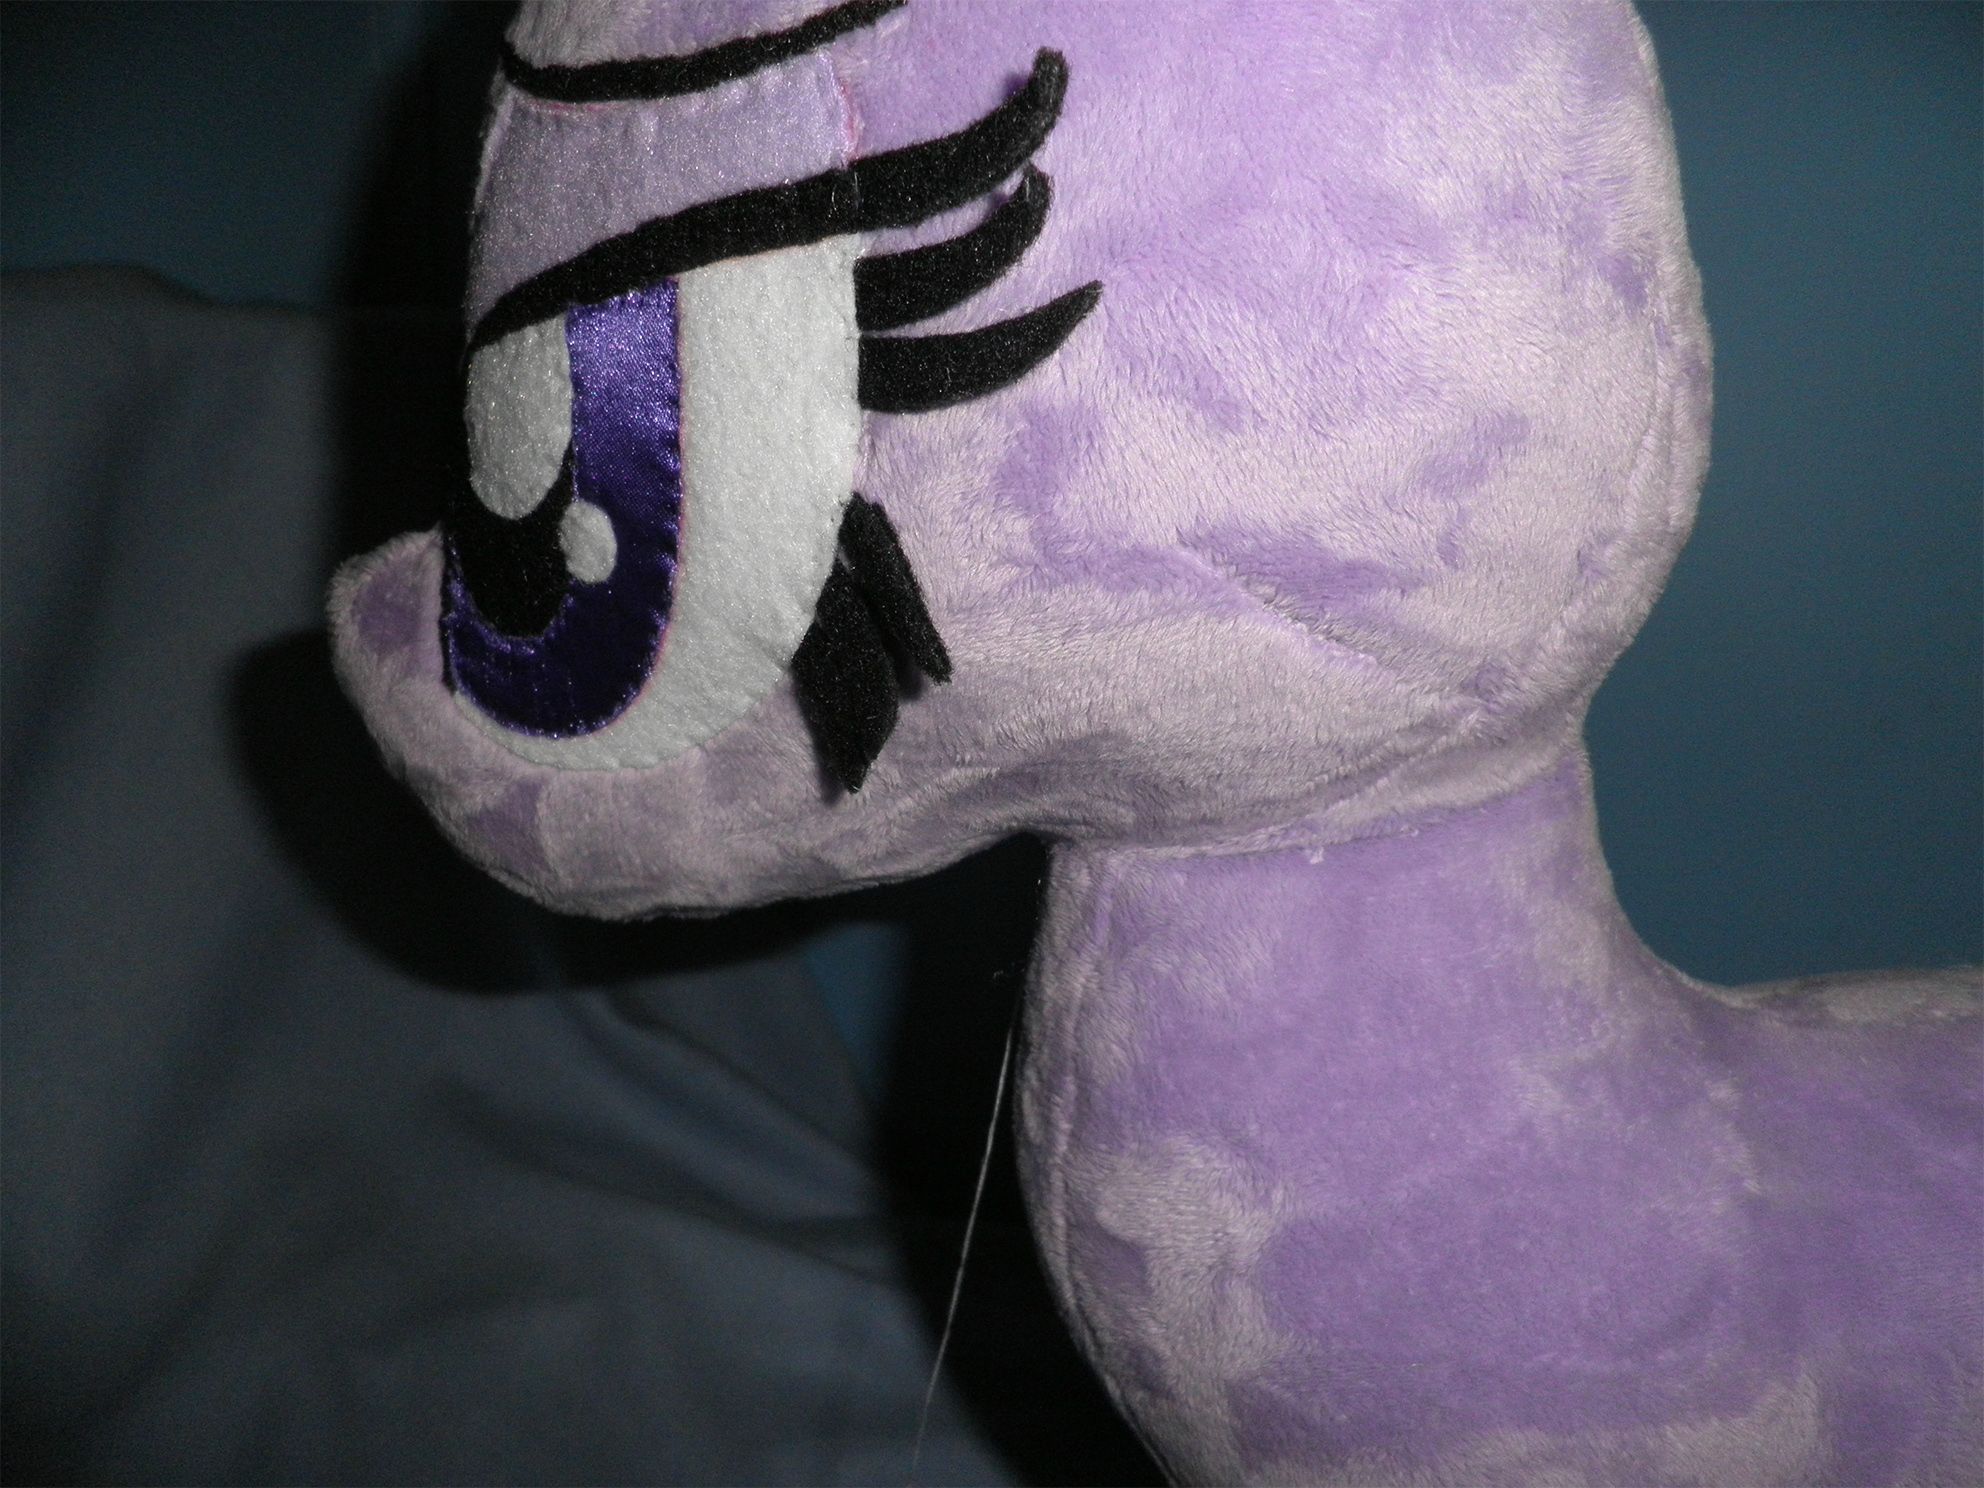
I revamped the head pattern, mostly to try to get a better front view, and I'm pretty pleased with the outcome. Both the front and side views look pretty good I think!

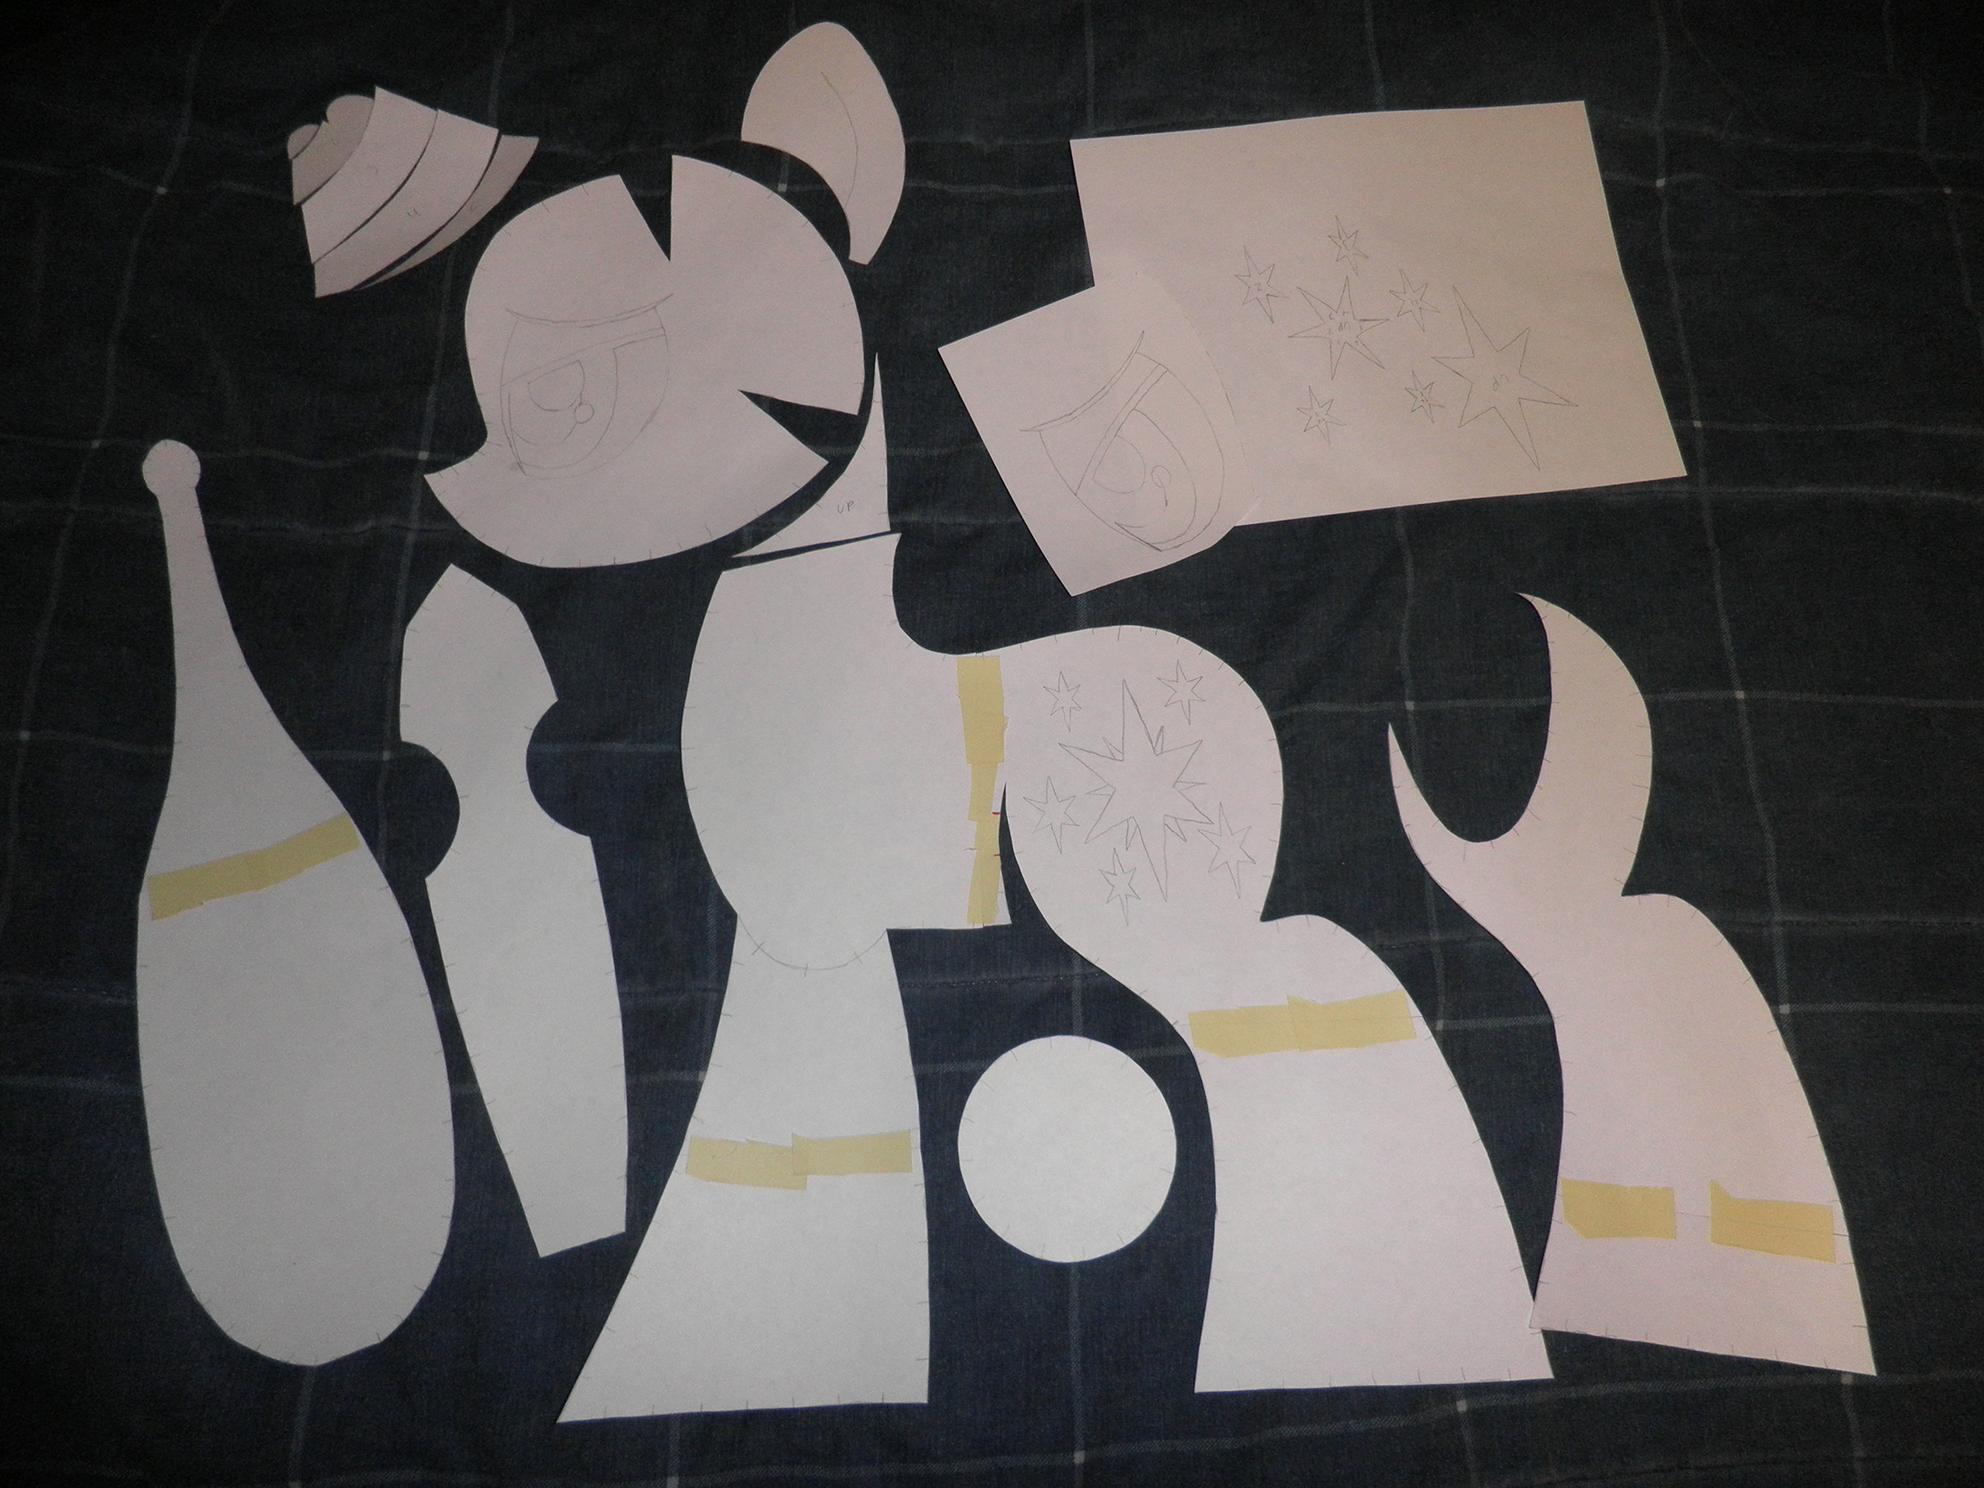
Now for the pattern. This is exactly what I used to make my plush, so you can know what to expect.
The plush I make in this guide is 20", so if you try making a little tiny plush, or a huge life size using this pattern, I can't make any guarantees how it will turn out!
For a 20" pony, print out at 39%. (Click the cogwheel in the top right corner for the full resolution image.)


I'm sure there are better ways to do this though...
Oh, and keep in mind the minky fur direction! In this pic the fur is going downwards which is what I want.

I should have done the cutie mark and eyes at this step but it slipped my mind and you'll see I get to it soon.


Don't cut right on the lines, give yourself some room (seam allowance). You can see how much seam allowance I like to give myself in the pic.
The arrow on the hoof is just noting the fur direction so I can get all 4 hoofs looking right.
The piece to the left is the body piece, notice how I like to give extra space at the top where the neck is. This is just something I like to do to strengthen the neck area a little by folding it over and sewing it shut. Is this necessary at all or does it even do anything? I don't know but it seems like a good idea to me.

Fire up your needle and thread because it's time to start sewing.
We'll start by sewing the 2 inner front leg pieces to the belly. Put them together like this, with the right sides together. The right side of the fabric is the side with the furs (if you're using minky), NOT the side with the marker. Remember you always sew with the right sides facing together!
Be careful not to sew the leg on backwards. Look for the slight curve in the leg piece, you want that facing towards the front of the plush.
The squared off end of the belly piece is towards the front of the plush, it's actually the front of the neck area.
The pointed end of the belly will be towards the rear, the point is where the back legs come together and the butt starts to form.

Stick some pins in the tick marks ahead. I will generally use like 2-4 of them at a time.
These will help your stitching stay aligned, and will overall just make your life a whole lot easier.
I got the needle threaded (if you're like me when I first started and don't even know how to thread a needle, just search these things up on youtube) and am getting ready to sew along. I kinda made a mistake in this pic that I will explain in the next.

Get this curve sewn on using a backstitch. Just look it up online if you don't know how to do it. Also it came to my attention while writing this that I think I've been doing the backstitch incorrectly this whole time, how embarrassing.
In the last pic I started sewing right at B (out of rustiness,) but normally what I do is start like 1-2 stitches out from where you normally start (around A in the pic), then backtrack to B, then sew the whole distance to C, and then back a few stitches to D.
I used to not do this and found that my seams kept popping at the end points, and doing this solved that problem.
So when you've reached D, cut the thread with enough space to tie a knot (I tie like 3 knots just to make sure it doesn't come undone) and then cut off the extra thread hanging off the knot.
Repeat for the other inner front leg piece.


You can easily sew both legs on in one go.

Once all four legs are sewn on, sew from E to F, and then we are done with the belly piece for now.

Before we sew belly/legs piece to the body, we have to put the cutie mark on.

For the white stars I'm using felt.

For the large fuchsia star, I'm using minky. I'm going to apply some iron on stabilizer to it. I've never tried doing this without the stabilizer, but it was recommended to me and it sounds like a good idea.
So cut the piece of stabilizer out, lay the side with the glue over top the wrong side of the fabric, and iron it on.

And then trace and cut out the star.

I glue the 2 stars together because it's just a whole lot easier than having to sew it.
I forgot to take a picture of this next part.
Because I traced the outline of the cutie mark onto the body piece earlier, I now sew along that line so that the outline is visible from the front too. I find that it really helps with trying to keep everything aligned properly.
You can kind of see it in the pic, I should have used matching purple thread but it slipped my mind and I used red thread.

I quickly attach it at a few points to hold it in place. Try your very best to keep it aligned, it's not easy to do.
Something that was recommended to me was to use 505 basting spray to temporarily stick the piece to the body before sewing it in place.
While I've never used it, it sounds like something you should definitely check out so you don't have to fight to keep the pieces aligned like I do.

Once the main star is done, I put a little line to note the position of the smaller stars. Place the stars over these lines (on the right side,) and if it looks good, sew them on in the same way as the large star. If not, feel free to move it to wherever looks good.

The finished cutie mark. It all stayed aligned pretty well except for one of the small stars which I had to move a little.
If any of the thread that you outlined with is exposed, you can try to cut it and pull it out.

Now to sew the belly/legs piece to the body. Lay the body out flat, find the back leg that matches (with the right sides facing together,) and then sew from F all the way down, and then G all the way down. Don't sew the hoof area shut.
In the pic I have the first part done, F to the hoof is sewn, and I'm getting ready to sew from G all the way down.
The pic looks like a mess but all you need to worry about is finding the appropriate leg piece and sewing it together.

This is where it gets a little tricky. Once both sides of the back leg are sewn together, flip it over and sew from G to D. This is a tough spot so just go slowly and carefully.
Once you're done, don't cut the thread just yet, I like to go all the way from G - D - C - to the hoof in one go.

Now from D to C. You're sewing the body piece to the belly as we're done with the back leg.

Keep sewing all the way down to the hoof.
Again, don't sew the hoof opening shut.

From the hoof to B, you're sewing the two legs together, and then from B to A you're sewing the body to the belly.

Halfway done with the body.
Lay on the other body piece and start working on the other side. Repeat the last handful of steps starting with the back of the back leg.

This pile of fabric is finally starting to look like something now.
But anyways, onto the hooves.

I like to start from one of the "corners" if you will. The end points on the legs.
Sewing a round hoof onto the legs might look intimidating, but if you use enough tick marks, it's very easy. Not really much different from straight sewing.

Halfway there. Flip it over and keep going.


Before turning, I like to trim up the seam allowance in tight areas like the hooves. Be super careful not to cut your seams open.

Time to turn this body right side out. I use my thumb to roll the legs up into the body, and then pull them out through the neck.

There we go. I look it over to make sure nothing looks messed up or any threads hanging out the seams or something.

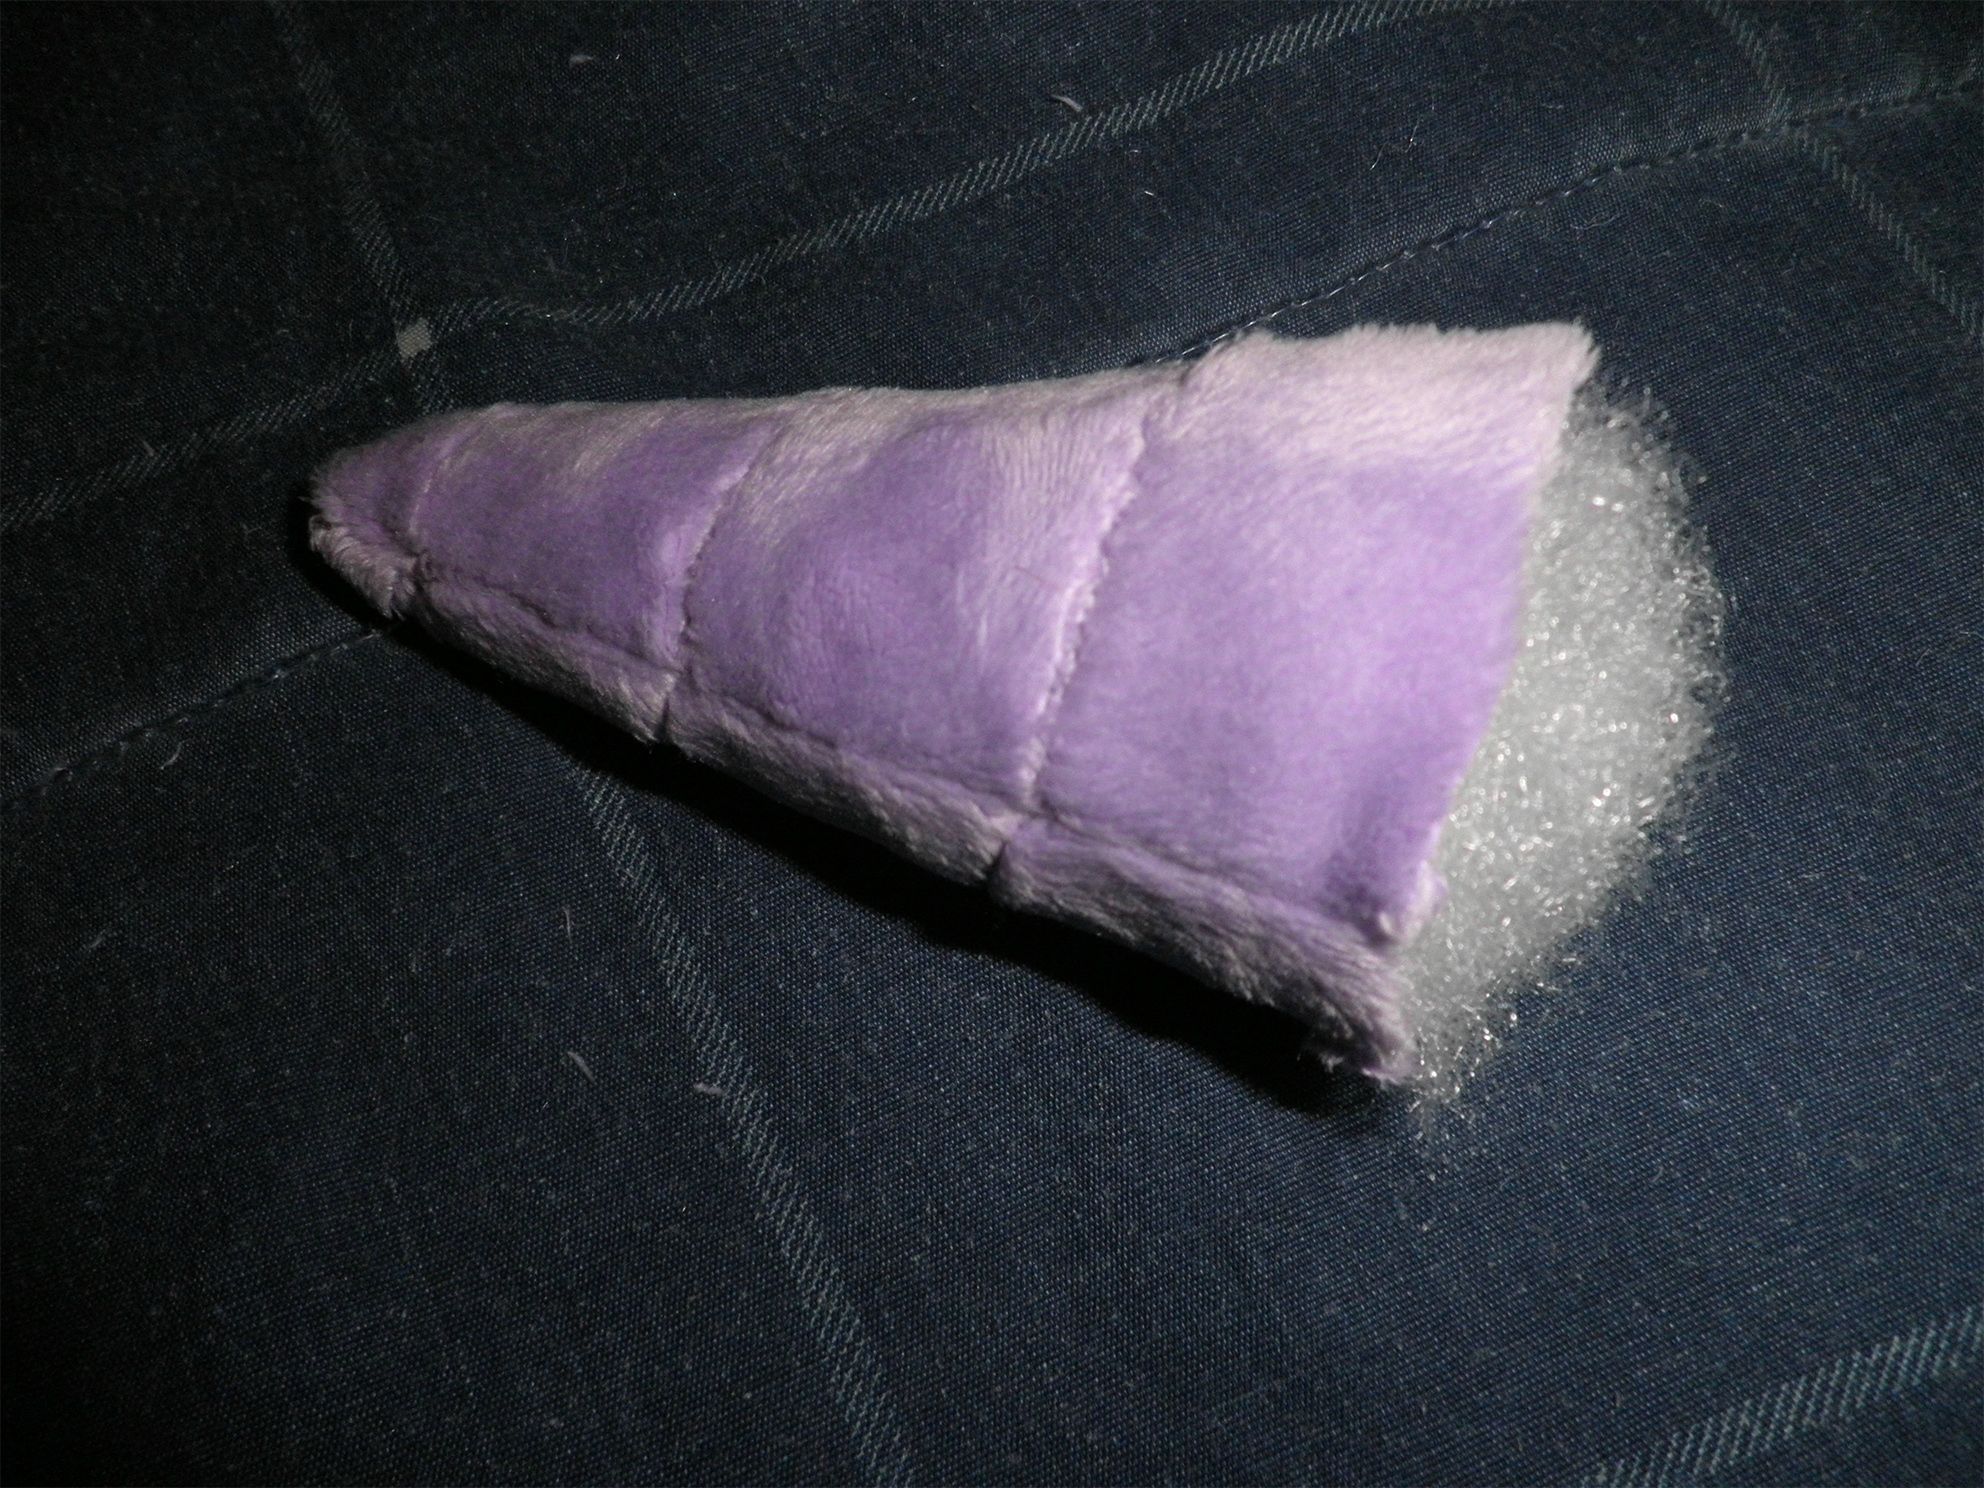
I tried doing some flat hooves, something I've never done before. I cut out a thin cardboard circle (from a cereal box), a little smaller than the actual hoof piece, and some larger circles made of fleece. I figured the fleece would make the hooves a little softer, so they doesn't feel rough.
Overall I feel like this method has its pros and its cons. The hooves certainly are flat, and they feel nice from the bottom, but it feels weird from the side. You can definitely tell there's something in there. I think you should try it for yourself and see how you like it.
This part is totally optional.

I go around it a few times pulling it in like a drawstring so it doesn't come undone.
I then stick it into the legs through the neck which was a little tough but still doable.

Time to stuff the pony.
I'm not sure what kind of tips to give here, I suck at stuffing consistently. Just take it slowly and try to be as consistent as possible.
I usually start with the back legs, then the front legs, then fill up the butt area and move towards the front.
Try to stuff the "joint" areas tightly where the legs will bend if you make your pony lay or sit down.

I stuffed this way too firmly and had to unstuff and restuff the whole thing. I guess it's all personal preference but I don't like it super firm. Not cuddly at all.

You can disregard this and the next step if you cut right at the neck line.

I slide the extra fabric inside the plush so that the line is on top of the rim, and then go around it sewing it shut, using matching thread. It's basically invisible in the pic.
I'll then cut off the purple thread as you don't need it anymore.

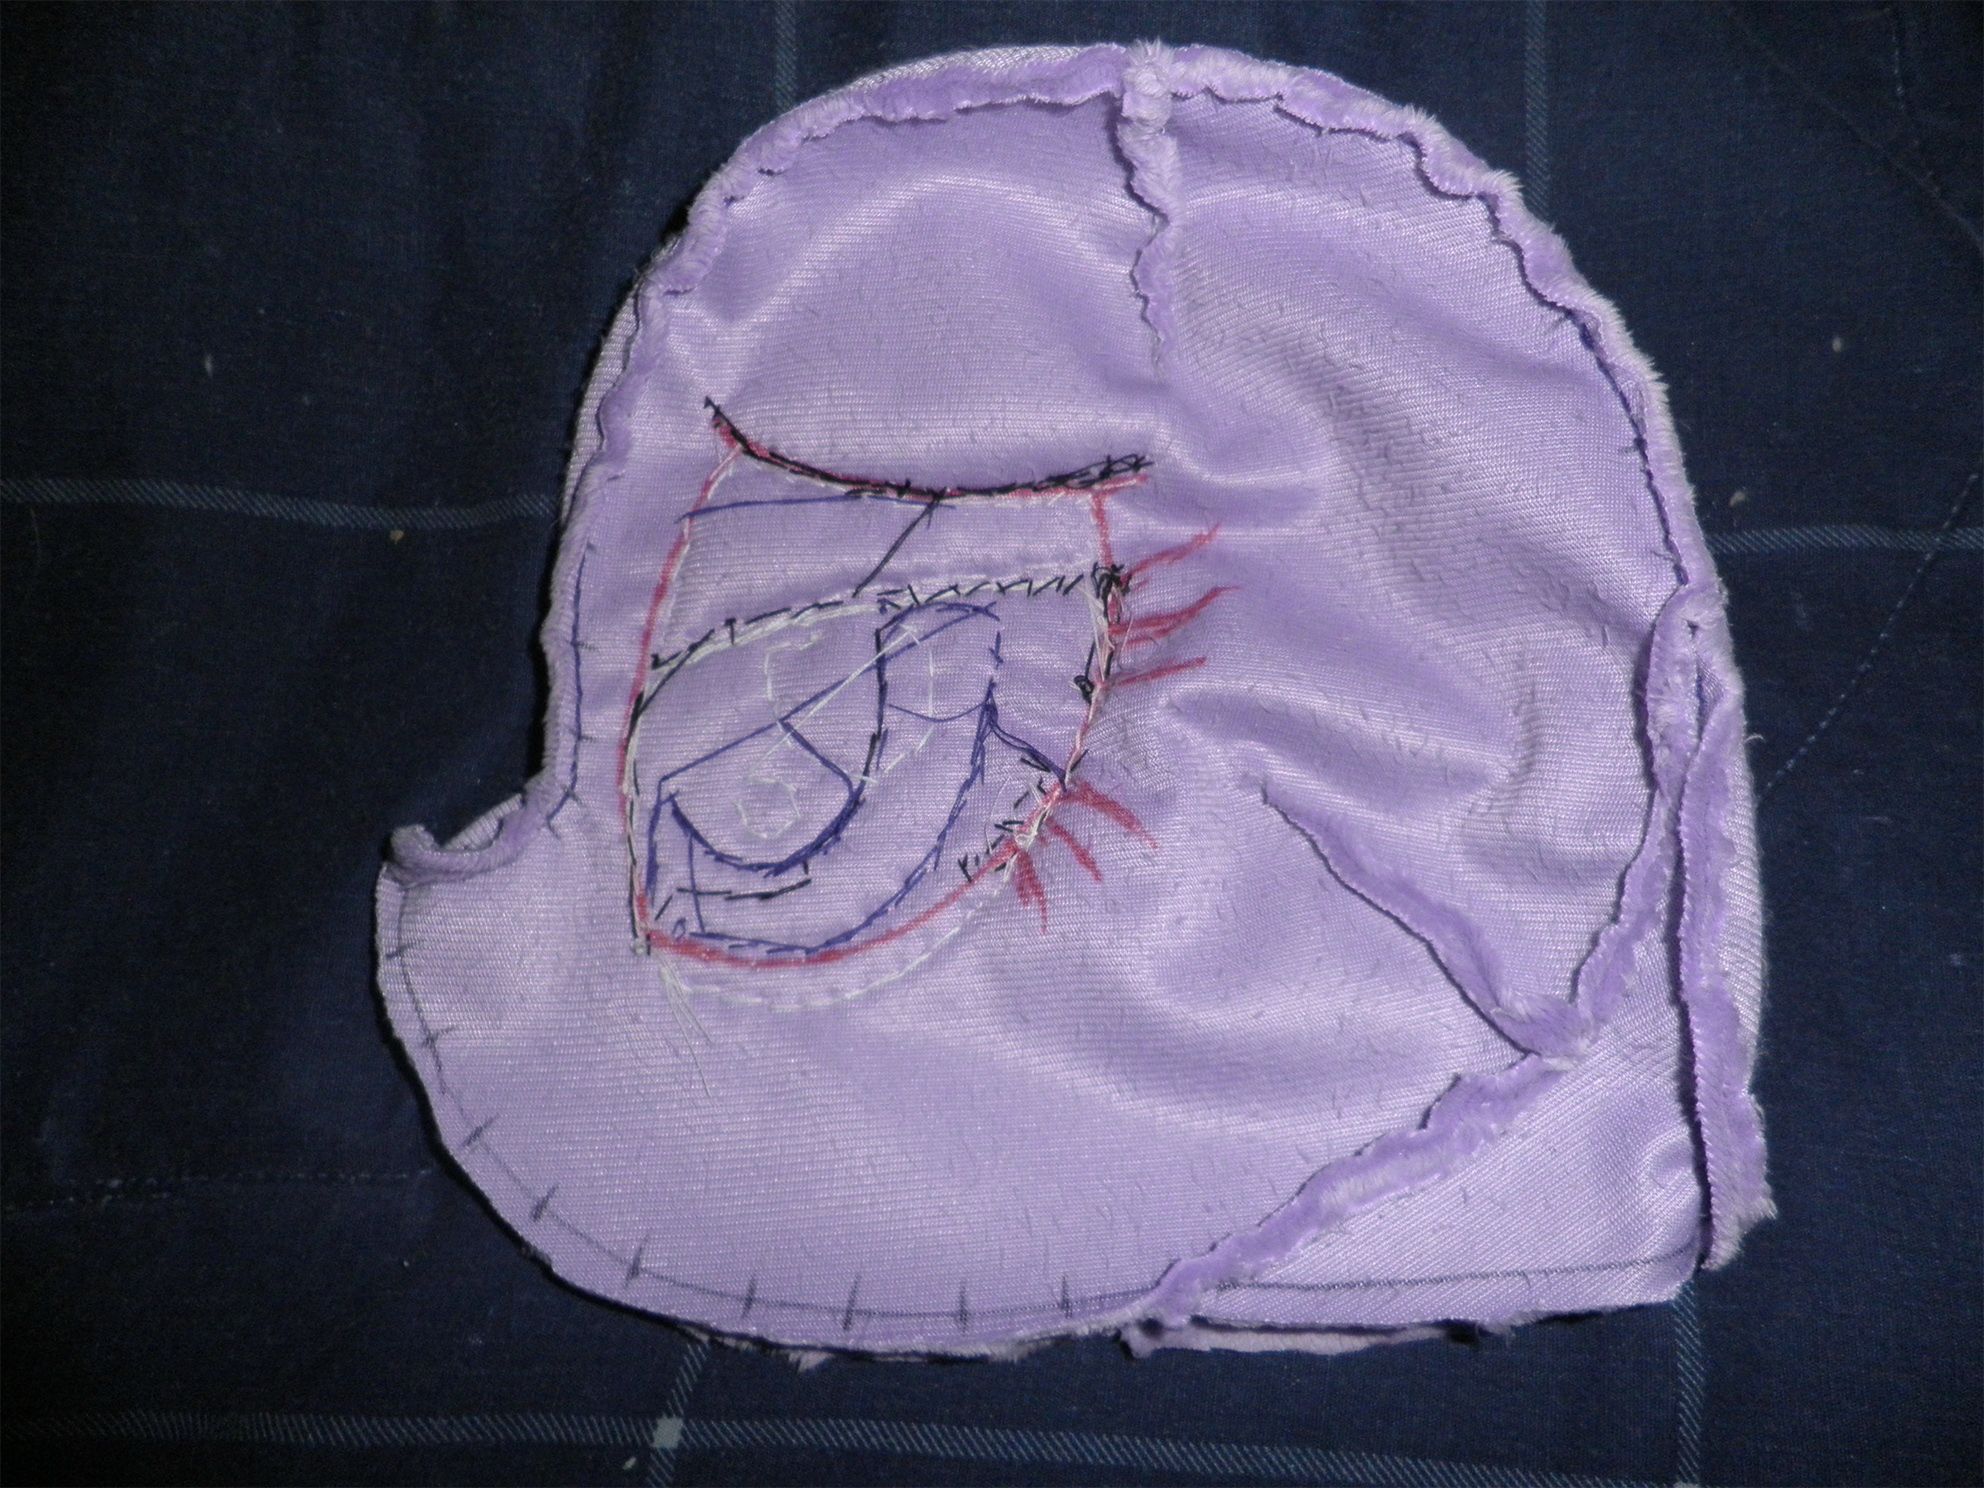
Time to start on the head, but before we sew it together, we need to put on the eyes.
Sew along the outline you should have marked on the head piece.

Cut out all the pieces of the eye.
For the materials I'm using, the white and black are felt, the purple above the eye is fleece, and the iris is satin. You can use whatever materials you'd like, but this is what I have so it's what I'm using. Note that for the satin iris I used iron on stabilizer.
When dividing up the eye, I like the pieces to overlap each other instead of meeting right at the edge so you don't have any gaps. I drew some dotted lines on the right side piece to demonstrate. If you're confused, try to focus on the upcoming pics.

I'm going to start with the lashes, but first I'm going to lay the pieces on top of each other so I can figure out where to put the first lash at.

And then I actually sew the lashes on. I'm doing 3D lashes, which are only going to be sewn at the base and then hanging off the eye freely.
Again I like to overlap the pieces so I extend the lash a little bit inwards, and sew it securely so they don't get ripped off.

Start off with the white piece. Try your absolute hardest to keep it in place while you try sewing it on. I had to tear it off like 5 times before I got it on mostly straight.
Again, you should consider using basting spray for this.

And then the piece above the eye.
You're probably wondering what's with all the red, that's just me using a red marker that bleeds through everything it touches like a retard.

I'm not going to post a pic for every little piece because the process is exactly the same.

Once you have the eye finished, it's time to sew up the head darts. (the little cutouts)

Repeat for the other side.

Sew the neck piece to the head. F to F, E to E, D to D.
And then sew on the head gusset. Start at the tip of the nose at A, going all the way to the squared off part at the back of the head at G.
The nose can be a tricky spot, just go slowly.

One side done, off to the other side. Same thing, start at A and end at G.
Now sew from A to F, leaving only the neck opening.

Turn it right side out.

And stuff it.

We have a headless pony and a bodyless head, so let's ladder stitch them together.

I start right at the spinal seam, try to center the head and begin ladder stitching around the neck. Pull tight with every stitch and try not to get too frustrated doing this with only two hands.

Before you finish, you'll want some additional stuffing in the neck so that the head doesn't flop around. I try to get in as much as I can and pack it firmly. Once it's all in, finish it up.

Mine is a little off center, but that's okay. I can never get it on perfectly.
And yes, the plush is looking pretty strange at this point. There's no ears or mouth or anything just yet.

This looks like something out of a horror movie and all but stick some pins in where you want the mouth, it will serve as your guide.

I start sewing along the guide back and forth a few times, pulling it slightly tight. I'm pretty bad at this so just find what works for you.
After the mouth I do the nostrils, just go back and forth a few times to make a little visible line.

Let's make our plush some ears. Same thing as always, put the right sides together and get to work. Leave an opening like I did so you can turn it.

I cut out a piece of fleece (because I have no quilt batting to use instead) to stick inside the ear to give it some extra thickness.

The fleece is in, so now we ladder stitch the ear closed.

Figure out where you want to put the ears and pin it in place. I ladder stitch it starting from the top at the green pin, down to the bottom, then go back up around the other side. You might want to go around it once more.
Once the first ear is on, try to keep the second ear perfectly aligned on the other side.

After struggling to make a good looking horn for awhile, I came up with this awesome idea. The seam from sewing these pieces together forms the spiral!
Get them all sewn together.

Turn it and stuff it.

Go around the opening a few times pulling it shut. You'll probably need to stick some more stuffing in as you do this, just take a pencil and stick it through the small opening in the middle.

Damn, this one went on beautifully.

Off to make some wings. (optional, of course)
Trace it onto your fabric, and when you're done, cut it up into pieces and trace the details on as well. You really only need to do this for the piece that will face outward for each wing, so if you can figure that out you can save yourself some time and effort.

I don't really have a picture of this step, but you'll want to sew an outline of the wing details on the right side of the fabric. Just like we did for the eyes and cutie marks.
This is a pretty bad picture to use, the side that I sewn along the detail lines is actually lying face down in this pic. Whoops.
After you've done that though, you can sew the wing together, leaving the opening at the area that you will attach it to the body at.

Now that the wing is turned, you can see the side of the wing that has the detail lines that I've sewn on.
I cut out two pieces of fleece to stuff inside to make this wing nice and thick, and because it will be necessary for the next step.

The fleece layers have been stuffed inside, so now I went over the detail lines once more, pulling tightly with every stitch. You really want to compress the wing along these lines to make it pop.
I've finished all but the top line in this pic, you can really see the difference. If you've pulled it tight enough, you shouldn't be able to see much of the thread at all.
Once you're done, ladder stitch the wing closed.
I'm actually really happy with how these wings turned out. They look and feel nice.

Pin it to the body and ladder stitch it on. Unlike with the ears, I don't go around the reverse side of the wing as it's kind of awkward to do, so I just go back and forth 3-4 times.
Once you're done repeat for the other wing trying to keep it aligned properly.

Almost done, our pony just needs a mane and tail now.

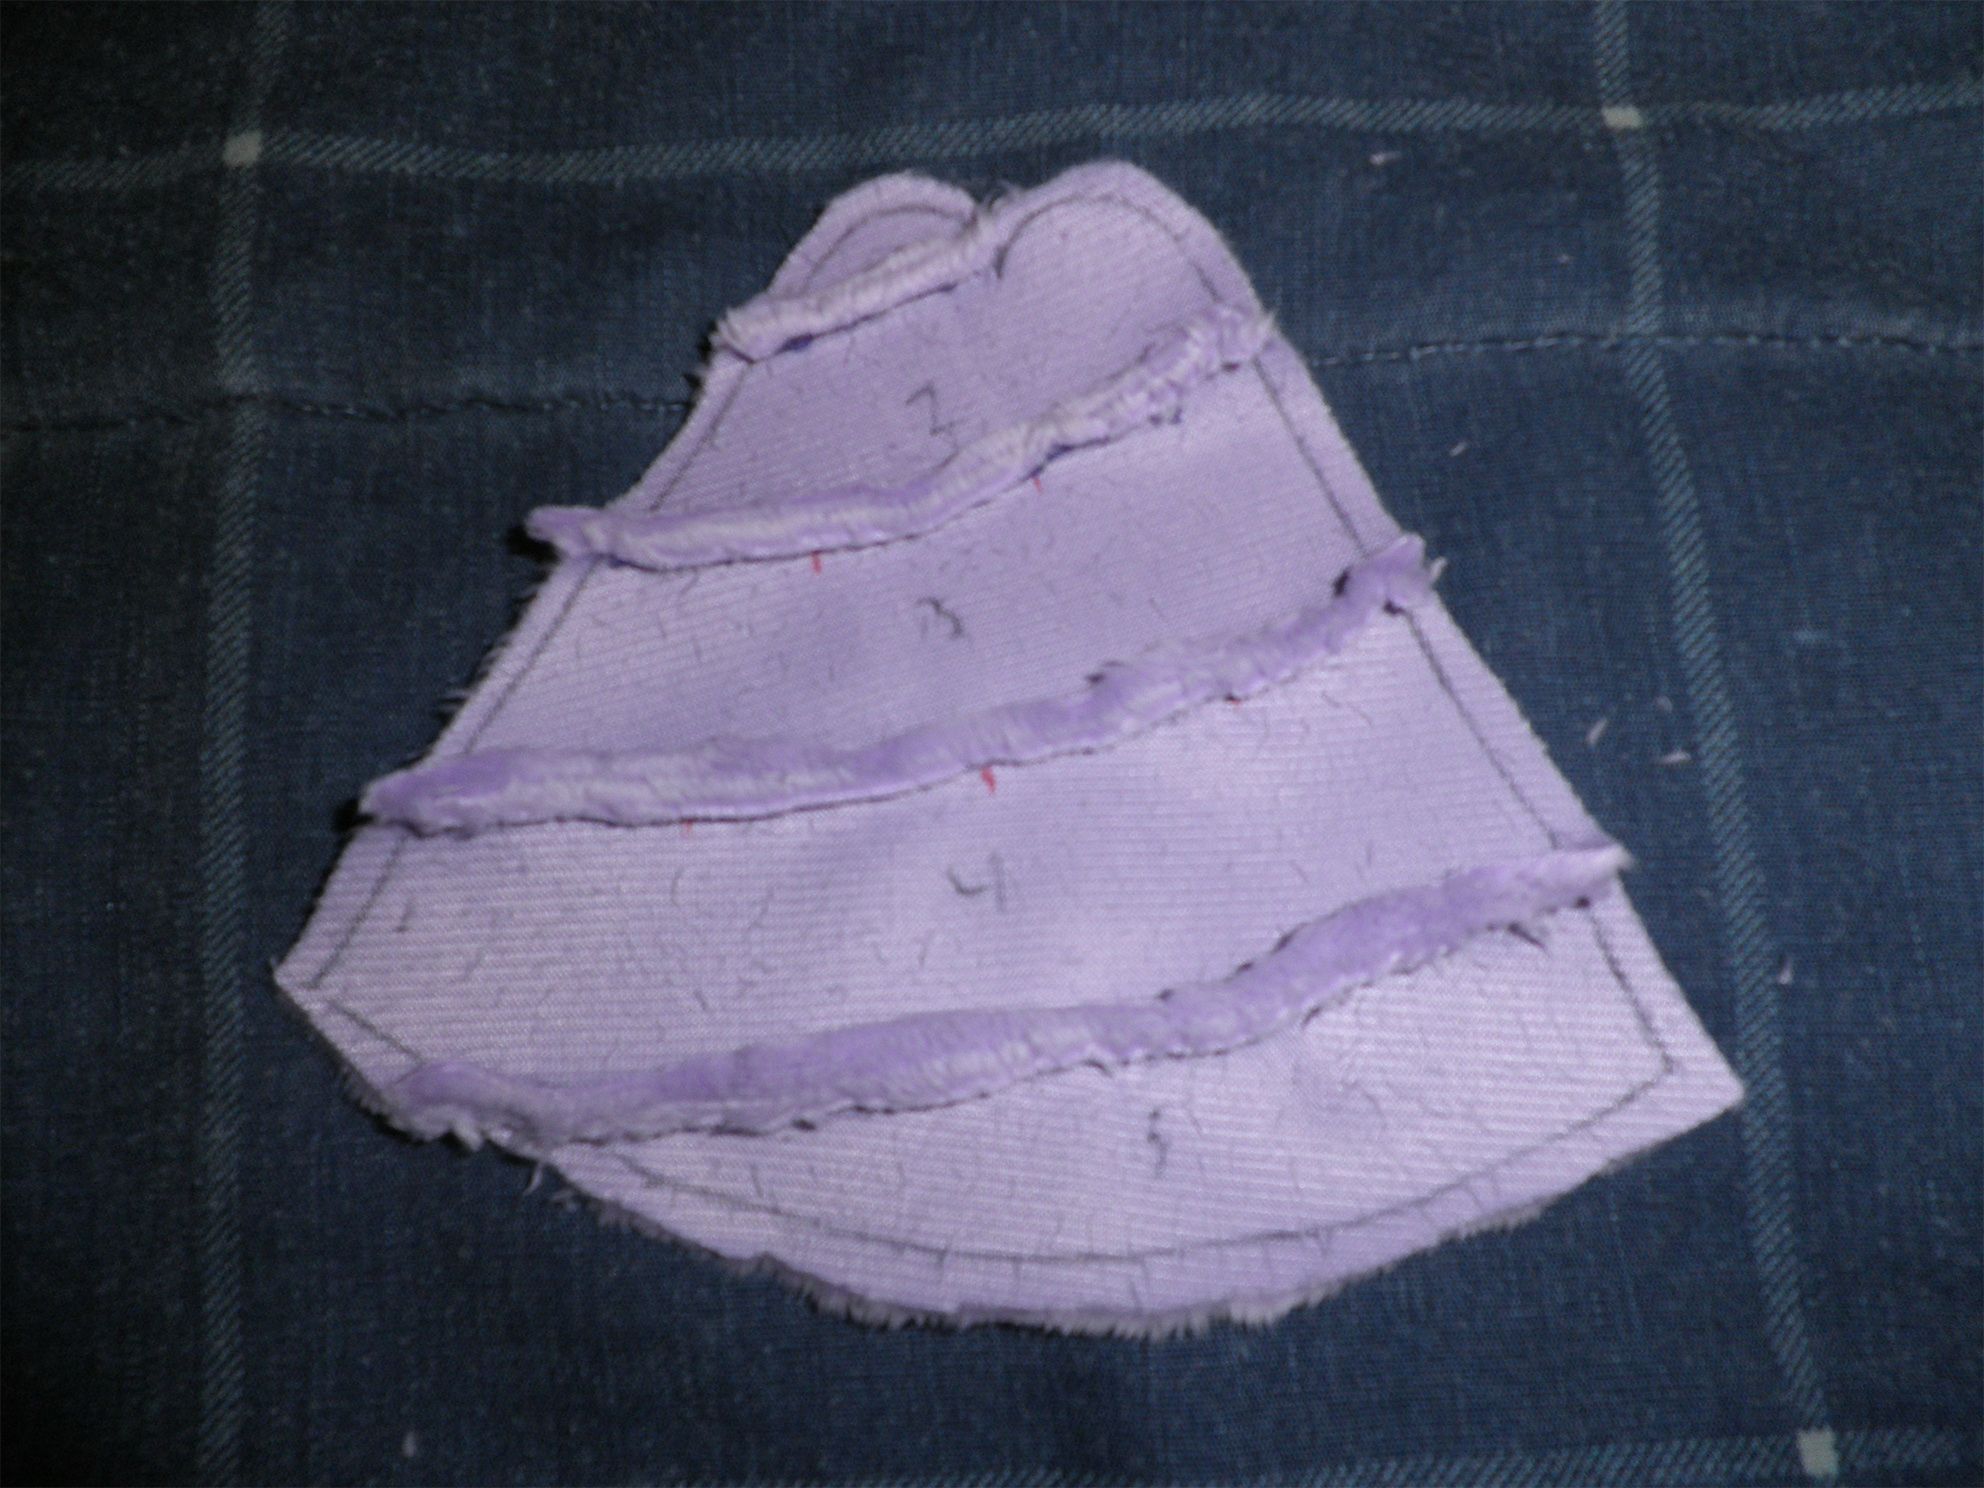
Because Twilight has a pretty simple tail, I just drew up the pattern on the computer as opposed to having to pattern it out like I will for the mane.
I traced and cut it out, drew on the tick marks, and put on some arrows for the minky fur direction.

Cut the pattern into strips and cut out all your pieces.

And then sew them together.

Now sew the two tail pieces together. I point out where I like to start and end. Leave the base and a good portion of the inner side open.

Tail dock, because why not? It will help give the tail some roundness at the base anyways.
I freehanded a shape like this and cut it out.

And then sew it on like so.

Same thing for a circle piece to sew at the base of the tail. I always have a hard time with this, trying to guess the size and then trying to sew it on without any tick marks. It's fine if it doesn't look perfect because it's going to be hidden for the most part anyways.

After some frustration, it's on.
Instead of turning the tail right where the dock ends, I do like 3 stitches downwards to give it some room.

And then turn and stuff the tail to your desired firmness.

Prop your pony up on something and begin ladder stitching the tail on. You'll certainly want to go over this at least three times or the tail will probably start to rip off because it's stuffed and kinda heavy.

Looks nice! Only the mane is left now.

Now for the worst part, having to pattern out the mane.
I'm starting with the top part of the mane, so I cut an X into some paper towel and pull it over the horn. Then I cut around the ears and pin it in place in the back.

I cut the front part and overlap the paper towel so that it sort of hugs the shape of the head. Pin it in place and start sketching the mane.

Because I want both sides to be identical, I really only sketch out one side of the mane. Draw the line going up the middle to the back.

And then take the paper towel off and this is what you're left with. I cut out the right hand side, trace it on to some paper, hold it up to my computer monitor and trace around it to digitize it. Then mirror it horizontally so that both sides are the same. Print/trace it out again onto some paper and try sticking it onto the pony to see how it looks.


When you have the front part of the mane done and looking the way you want, repeat for the back side.
Lay some paper towel over it, pin it in place, cut around the ears, and start sketching. If you need more room, just tape on some more paper towel.

There we go, that's about how I want it.

Trace it onto some paper, and again I like to digitize it.
Figure out where you want the cutouts and stripes and all that. I usually just do this on the computer as opposed to sketching it on the paper.

There's one important step before you finish up the pattern. If you're going to stuff it with anything, you'll want to scale the pattern up a little bit to compensate for it, otherwise it will look smaller than you expected. Scaling it up even to like 105% will probably work.
I'm going to stuff it with some more pieces of fleece. You should probably use quilt batting; I'm only using fleece because I don't have any.
Draw all your tick marks before cutting it all up.

Cut out all your pieces and start sewing them together.

Sew both sides together leaving the top open. This piece in particular has a lot of tight spots that you'll want to trim up the seam allowance as best you can.

For turning pieces like this, I find a pair of hemostats very useful. Just stick it on in there and pull it out. They're very cheap, too.

And then I stick the piece of fleece in there, which was actually really hard to do.

Repeat for the back of the mane. Same exact process.
Ladder stitch them both shut. I also ladder stitch the front of the front mane, where the blue and purple come together.

Lay your mane on, pin it down, and hope and pray it looks right.

Once you have it all positioned just the way you want it, ladder stitch it on. Go around one side, then flip it over and go around the other.

One more step. I was going to try to have the mane free floating so that I could move it to either side, but I wasn't pleased with it, so I'm going to ladder stitch a small section of it so it won't move around much.

All finished! One last pic of my little Twilight family.
This plush took me many, many hours. Easily over 100. I made this plush entirely with leftover materials from my big (30") plush. Those two combined probably ran me about $120 in materials. Pretty cheap, but only if your time is worthless.
This image album came out REALLY long, so I'd be quite shocked if anyone actually read through it all. Even if you just skimmed through it, that's fine too.
I hope you found it at all interesting or helpful. If there's anything that I didn't cover or explain well enough, do let me know.
Originally found at: https://imgur.com/a/eLPmP
Originally uploaded on July 31st, 2015
Archived here on April 20th, 2023 after learning imgur is removing ALL NSFW content, which this guide was marked as. Really awful imgur went the route they did, but I love this guide and would hate to see it lost. I hope it helps you achieve the waifu plush of your dreams! ^:)